Monday, August 31, 2009

Book Sketching Day 6 : Sky Doll


First off apologies - but a few of the photos I took turned out blurry - the first few (gesture images) were so blurry I didn't even bother to include them.

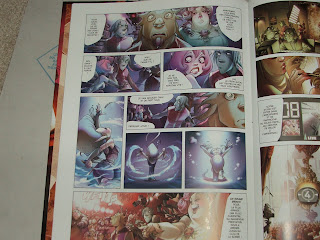
So - after a week off, it felt great to be back Book Sketching. This time, the subject was Sky Doll. It's going to take some time to get used to the style, but I really enjoyed it. I especially liked drawing the fat lady. ha ha.

I spent about 20 minutes blocking out the page with gestures and basic forms before hitting the details.

As I look back at what I did, I noticed quite a few mistakes that really bothered me. For example, in the first panel - the guy in the middle - his jaw (left side/right side) is not balanced. The same type of problem is repeated in several other areas of the page.

I think it's happening because - as I go to add the details, I am working over the underlying forms - rather than continuing the process of building the forms/volumes. It's as if I was sloppily highlighting text from a book, rather than writing the words out myself.

Another example of this is panel 3 - Sky Doll's arm - the under part. The line I put down was not really trying to build the form. It was more of a rough start, but then I moved on. Next time around, I will try to keep this in mind, and work to solidify the forms a bit more in the final stage.

On the other hand, I managed to fix other mistakes in the final stage - like the close up in panel 5. It's not perfect, but if you compare the final image to the blue pencil version, you can see the changes. For panel 4 (dancer) I went beyond the panel in order to try and figure out the forms of her legs better.

Overall the 1 hour limit - doesn't seem to be enough, but it's only been 6 days, so I am hoping to get faster in order to do a more complete job and hopefully with some more accuracy. On the other hand, it's exciting to race to the finish each time. It Feels like I am on a game show, as the clock counts down.

If you are still on the sidelines, give it a shot and see how much fun it can be for yourself.

During the first week, I jumped a lot from book to book, but what this meant was that I never really got comfortable with any one style. By style, I am referring both to the details as well as the forms the artist used. So far, all the books I used were cartoony, but the shapes of the characters were quite different from one another. Everything from head shapes, eye shapes, mouth shapes, etc..

If things go as planned, I would like to continue with Sky Doll for the rest of the week to see how much improvement I can achieve when I stick to one subject/style over 5 nights.

Saturday, August 29, 2009

Are you Ready for Monday?

I know most folks don't look forward to Mondays - but this week, I can't wait. One more day to go at Fan Expo, and I can get back to book sketching.

For those who are new to the blog: This blog is one man's journey (mine) to try and reclaim my drawing ability by copying from books. The goal is to draw for 6 months using construction in order to re-teach myself how to draw. I will do this 5 days a week, 1 hour each day, while looking for incremental improvements.

By making the process public, I am keeping pressure on myself to keep up with it all, while hopefully inspiring others out there to pick up a pencil and get drawing.

I hope to emerge on the other side with a much improved drawing ability.

You can try this too - it's a lot of fun and best of all -IT'S FREE.

After 6 months, hopefully I will be comfortable enough with construction, to move on to rendering. I already have some great books lined up. After that, I plan to invent the cure for cancer and find out who killed Michael Jackson.

Cheers,
Dan.

Saturday, August 22, 2009

NEXT POST ON AUGUST 31ST

just a reminder - I will be back with regular daily (monday-friday) posts starting on Monday August 31st.

until then -go do some of your own drawing. ha ha.

Friday, August 21, 2009

Day 5 - more vampires


Found my old blue pencils (col-erase) and so decided to give them a try. I think I went a bit over 1 hour today. Didn't do a great job timing it, but it seemed a bit longer. Time passes by when you're having fun.


So this is the end of the first week. I will be off this blog for 1 week. back with new stuff August 31st. The next week will be crazy as we price, pack and prepare for the local comic/anime/horror convention.

My experience so far has been real positive. I really enjoyed myself. I know the art isn't so hot -but part of the philosophy behind this blog is to work out the 10,000 bad drawings within all of us, so I can get to the good drawings. Ha Ha.

Thursday, August 20, 2009

Day 4 - Another Comic Page


Yesterday I was all gung-ho to continue doing sketches of cartoony characters and examine the relationship between shape drawing and gesture drawing, but as I was looking for reference tonight I came across this great French graphic novel called Daffodil about vampires. So I went back to doing a comic page.

Tonight I only took photos after finishing stage 3 (all the details) - but I think I will go back to photographing each step as I complete it for the blog starting tomorrow. Even though I am drawing for myself, taking the photo helps me define the end of each step with a clean break. The nice thing about having the distinct stages, is that it allowes me the chance to try and correct 'errors' each time.

At each point I look for different elements of the drawing and this helps me notice different problems in my drawing. For example, sometimes when I finish stage 1 gesture - and then try and apply volumes (cubes,cylendars) to the figures - I find some of the porportions no longer work as well. Limbs and body parts may be too long or too short,etc.. I try and correct these problems at this second stage. The final stage - allowes me to push the forms further beyond the basic forms and into the final design. For example if you look at the first panel on the last row - the close up of the dracula character, you can see his head is not a perfect sphere. Nor is it an exact egg shape. It tapers at the bottom and really bulges out in the middle, then rounds out at the top.

I stayed with pencil to complete all 3 stages, but at the end I had about 9 minutes left, so I started going over some of the panels with ball point pen. I was using a very dull pencil and didn't feel like looking for the sharpener. Tomorrow I will be sure to keep the sharpener handy -so I can finish the drawing (all 3 stages) a bit more cleanly. To make this work, I draw stage 1 (gesture) very lightly. Stage 2 - volumes a bit darker, but still quite lightly and then for the final design (detail) stage I press down for a darker line. Hopefully tomorrow this will be clearer

All in all - I found working from this book a load of fun, and I spotted several other pages that I would love to do -so expect to see at least 3 or so more pages from Daffodil coming up.

Wednesday, August 19, 2009

DAY 3 - the illusion of life


A little something different today. I was planning to continue working from Alim Le Tanneur -but it got late, and so I found a different spot to draw at. The result was that I couldn't balance the 11 by 17 inch photocopy paper I have been using very well to do the comic pages. So I opted to draw sketches from an art book.

Overall, the drawings came up horrible, which is great -because it teaches me that I have a lot to learn and re-teach myself. The upside was, that I had a lot of fun drawing them. In fact, every day so far has been a lot of fun. I heard from one person following the blog today that said he couldn't believe how much fun doing this is. I encourage anyone reading this to try it.

**********
For those not familiar with the Illusion of Life -it's probably one of the most inspirational books out there for an animator or a would be animator. Not only is it full of awesome drawings, layouts etc.. but the stories are extremely interesting and educational.

What was really different about working from this book versus the last one -is the type of characters. In the last book -all the characters were human and so working with a 3 step approach that has gesture first, then volume and finally detail -didn't work quite the same way here. Even though its possible to force a strict skeletal type gesture on some of the cartoony characters in this book - it seemed a lot more natural to blend the gesture drawing with shape drawing. How does shape drawing relate to volume? That's a question I hope to answer as I work through it here on the blog.

To give you an idea of where I am heading with this, check out the last image above. In it you will find an unifinished gesture of a dog and a goose. I left it in this state, to help show what I am talking about. I am going to try exploring this a bit more tomorrow and see what what happens.

Tuesday, August 18, 2009

DAY 2


Book Sketching Day 2.

Still working from Alim Le Tanneur volume 1.

Picked a page that was not as busy. At least -that had less characters on it. Still ran out of time. Stage 1 blocking in panels and gestures took about 10 minutes. I made a bigger effort to keep this stage simple. Yesturday I blocked in some basic shapes along witht the gesture. Basically, I added volumes for things like the torso etc. Today, I tried to avoid this and only work with a skeleton type gesture that showed the hips, spine, shoulders, head, arms and legs.

Stage 2 adding form (volume) took another 10-12 minutes, and then the last stage took almost 40 minutes, but I still ran out of time. Realizing I was running out of time when I got to the 3rd row of panels, I made the decision to focus on the characters and leave the background alone. As I got to the last panel of the page, I started to go back and do a bit more of backgrounds.

As far as backgrounds go, I am eyeballing the perspective. I know its not perfect, but right now it's good enough. I plan to spend more time with backgrounds in a few months when I am more 'warmed up'. ha ha.

Today I really tried to be conscious of what my purpose was in each stage. Especially during Stage 2 -where I tried to think of complete forms and draw through even where there was overlap. When a person copies, there's a tendency to want to only copy the what's shown rather than really drawing forms.

It's a bit messy doing this, so a couple of times, I erased a bit -to help me keep things clear after I drew forms on top of each other. a good example where you might see this is in the 2ND panel of row 2 , where the man is hugging the little girl. I drew the man's torso as a full shape (rounded box) then put the cylinder arm shapes over top. It was getting messy, so i erased the inside of the arm shapes so they could pop out and help me see the relationship of the shapes better.

Stage 3 was probably the least thought out as I was rushing to try and finish. For this last stage I basically went in with a pen to try and define the details. Because most of these were left out in the earlier stages I just had one shot to make these work. Sadly, I don't think I did a great job. Tomorrow I will probably try and block in some of these details (especially Eyes, fingers or other key details) before I go to use the pen. Hopefully, that will allow me to have 2 chances to work out the relationships of the details to the bigger shapes.

Monday, August 17, 2009

1st Day Images.


I was expecting to be rusty, but I really felt it when I went to do todays Book Sketching. Being the first day, I decided to take some pictures showing the progress.

The book I sketched from is Alim Le Tanneur #1. It's a french graphic novel. The page I chose was quite ambitious, possibly too ambitious for the first day. As you can see, I didn't get to finish stage 3 which is the detail stage.

What I learned today -was that I need to work on stage 2 a bit more. looking at stage 1 gesture, versus stage two (volumes/construction) - I need to spend longer on this stage. I spent roughly 10-12 minutes on stage 1. roughly 15-20 minutes on stage 2 and the rest of the time on stage 3.

Tommorow I hope to make stage 2 a bit more of the focus, while still trying to get farther with stage 3. We'll see what happens. At any rate -the entire book sketching process is built around the idea that you get good the more you draw. Hopefully, after a month -there will be improvement. after 2 months, more so and so on.


Sunday, August 2, 2009

1st Drawing will begin August 17th

In case anyone has found this blog by accident, I wanted to let you know that I will start posting artwork starting August 17th. Then hopefully every day after that. This blog will be made public around that time.

Saturday, August 1, 2009

CONSTRUCTION IN 3 PARTS

Before starting, it would be worth while to explain the method that I hope to follow during my time spent book sketching.

Since the goal is to become a better drawer, I will follow a 3 step process that I hope will get me the desired results. The process is:

1. Gesture.
Also defined as Acting or Action. This begins with a single line that represents the action or the emotion. The single line is then transformed into a stick figure or skeleton that allowes me to judge proportion, and pose. This first area is quick and easily adjusted . For example, if I draw a figure (stick figure) bending forward, it is quite easy to make the figure bend further, or bend less. doing these changes with a finished/detailed figure would be a lot more work. Proportions, such as the length of limbs, size of the head, etc.. are easily adjusted at this stage. For inanimate objects, locations etc.. this is where I consider composition.

2. Structure.
Once the basic gesture drawing is done, the next step is adding volume or structure. Using basic forms such as cubes and cylinders to define the character in 3 dimensional space. The advantage of this step is that its easier to work with basic shapes when dealing with perspective issues. For in-animate objects like buildings or machinery, this is the stage where I consider perspective.

3. Design
This is the final stage or the detail stage where I hope to add things such as hair, facial features, clothing details etc.. For inanimate objects/locations this is where I add architectural details or other technical details.

4. Rendering
For the purpose of this blog, I will be holding off all rendering for the time being. While I personally believe that rendering is extremely important, there's no point spending effort/time rendering drawings that are poorly constructed or designed. For that reason, I will focus on steps 1-3 above and once I feel that the drawings I do are solid, I will begin the second stage of the blog which will focus on this 4Th step:

FYI: rendering includes everything from cross-hatching to shading to colour.

Copying without Construction is just Copying.

Most folks that copy drawings usually do so by jumping to step 3 - Design. They copy the outline and details of the drawings they are looking at. They are not constructing the drawings from the ground up.

The problem is that, while they may become good at copying, they will have a hard time drawing from their imagination. This is because they won't really know how to start a drawing starting with a blank page. By building a drawing using steps 1-3 above, I am preparing myself for the eventuality of drawing my own stuff.